
Complete Guide to Online Student Admission in Aerish
Run online new-student admissions in Aerish: setup, registration, entrance exam, and announcement.

Online student admission, known locally as PSB (Penerimaan Santri Baru), is the first gate through which prospective students enter your pesantren, and in Aerish the entire process can be managed digitally from one place. This guide is written for admins, admission committees, and pesantren operators responsible for running new-student registration from the opening of a batch all the way to the graduation announcement. By following the steps below, you can open online registration, monitor applicants, verify documents and payments, schedule the entrance exam, and finally convert accepted applicants into official students complete with their accounts.
Aerish designed the PSB module so that committees no longer depend on paper forms and manual spreadsheet recaps. Every applicant record is stored neatly, registration payment status is tracked automatically, and selection results can be published with a single click. Let us walk through it from prerequisites to completion.
Prerequisites
Before opening online new-student admissions, make sure the following are ready so the registration flow runs smoothly:
- An admin/committee account with access rights to the PSB module (see Access Control settings).
- An active academic year, since accepted students will be placed into that academic year.
- Agreed unit/level data and quota per batch as decided by the committee.
- Registration fee details and a school bank account to receive payments (manual transfer or a payment gateway).
- The list of documents applicants must upload, such as birth certificates, family cards, or diplomas.
- The schedule, format, and weighting of the entrance exam if your pesantren holds an admission test.
Step 1: Configure PSB Setup (Batches, Quota, and Fees)
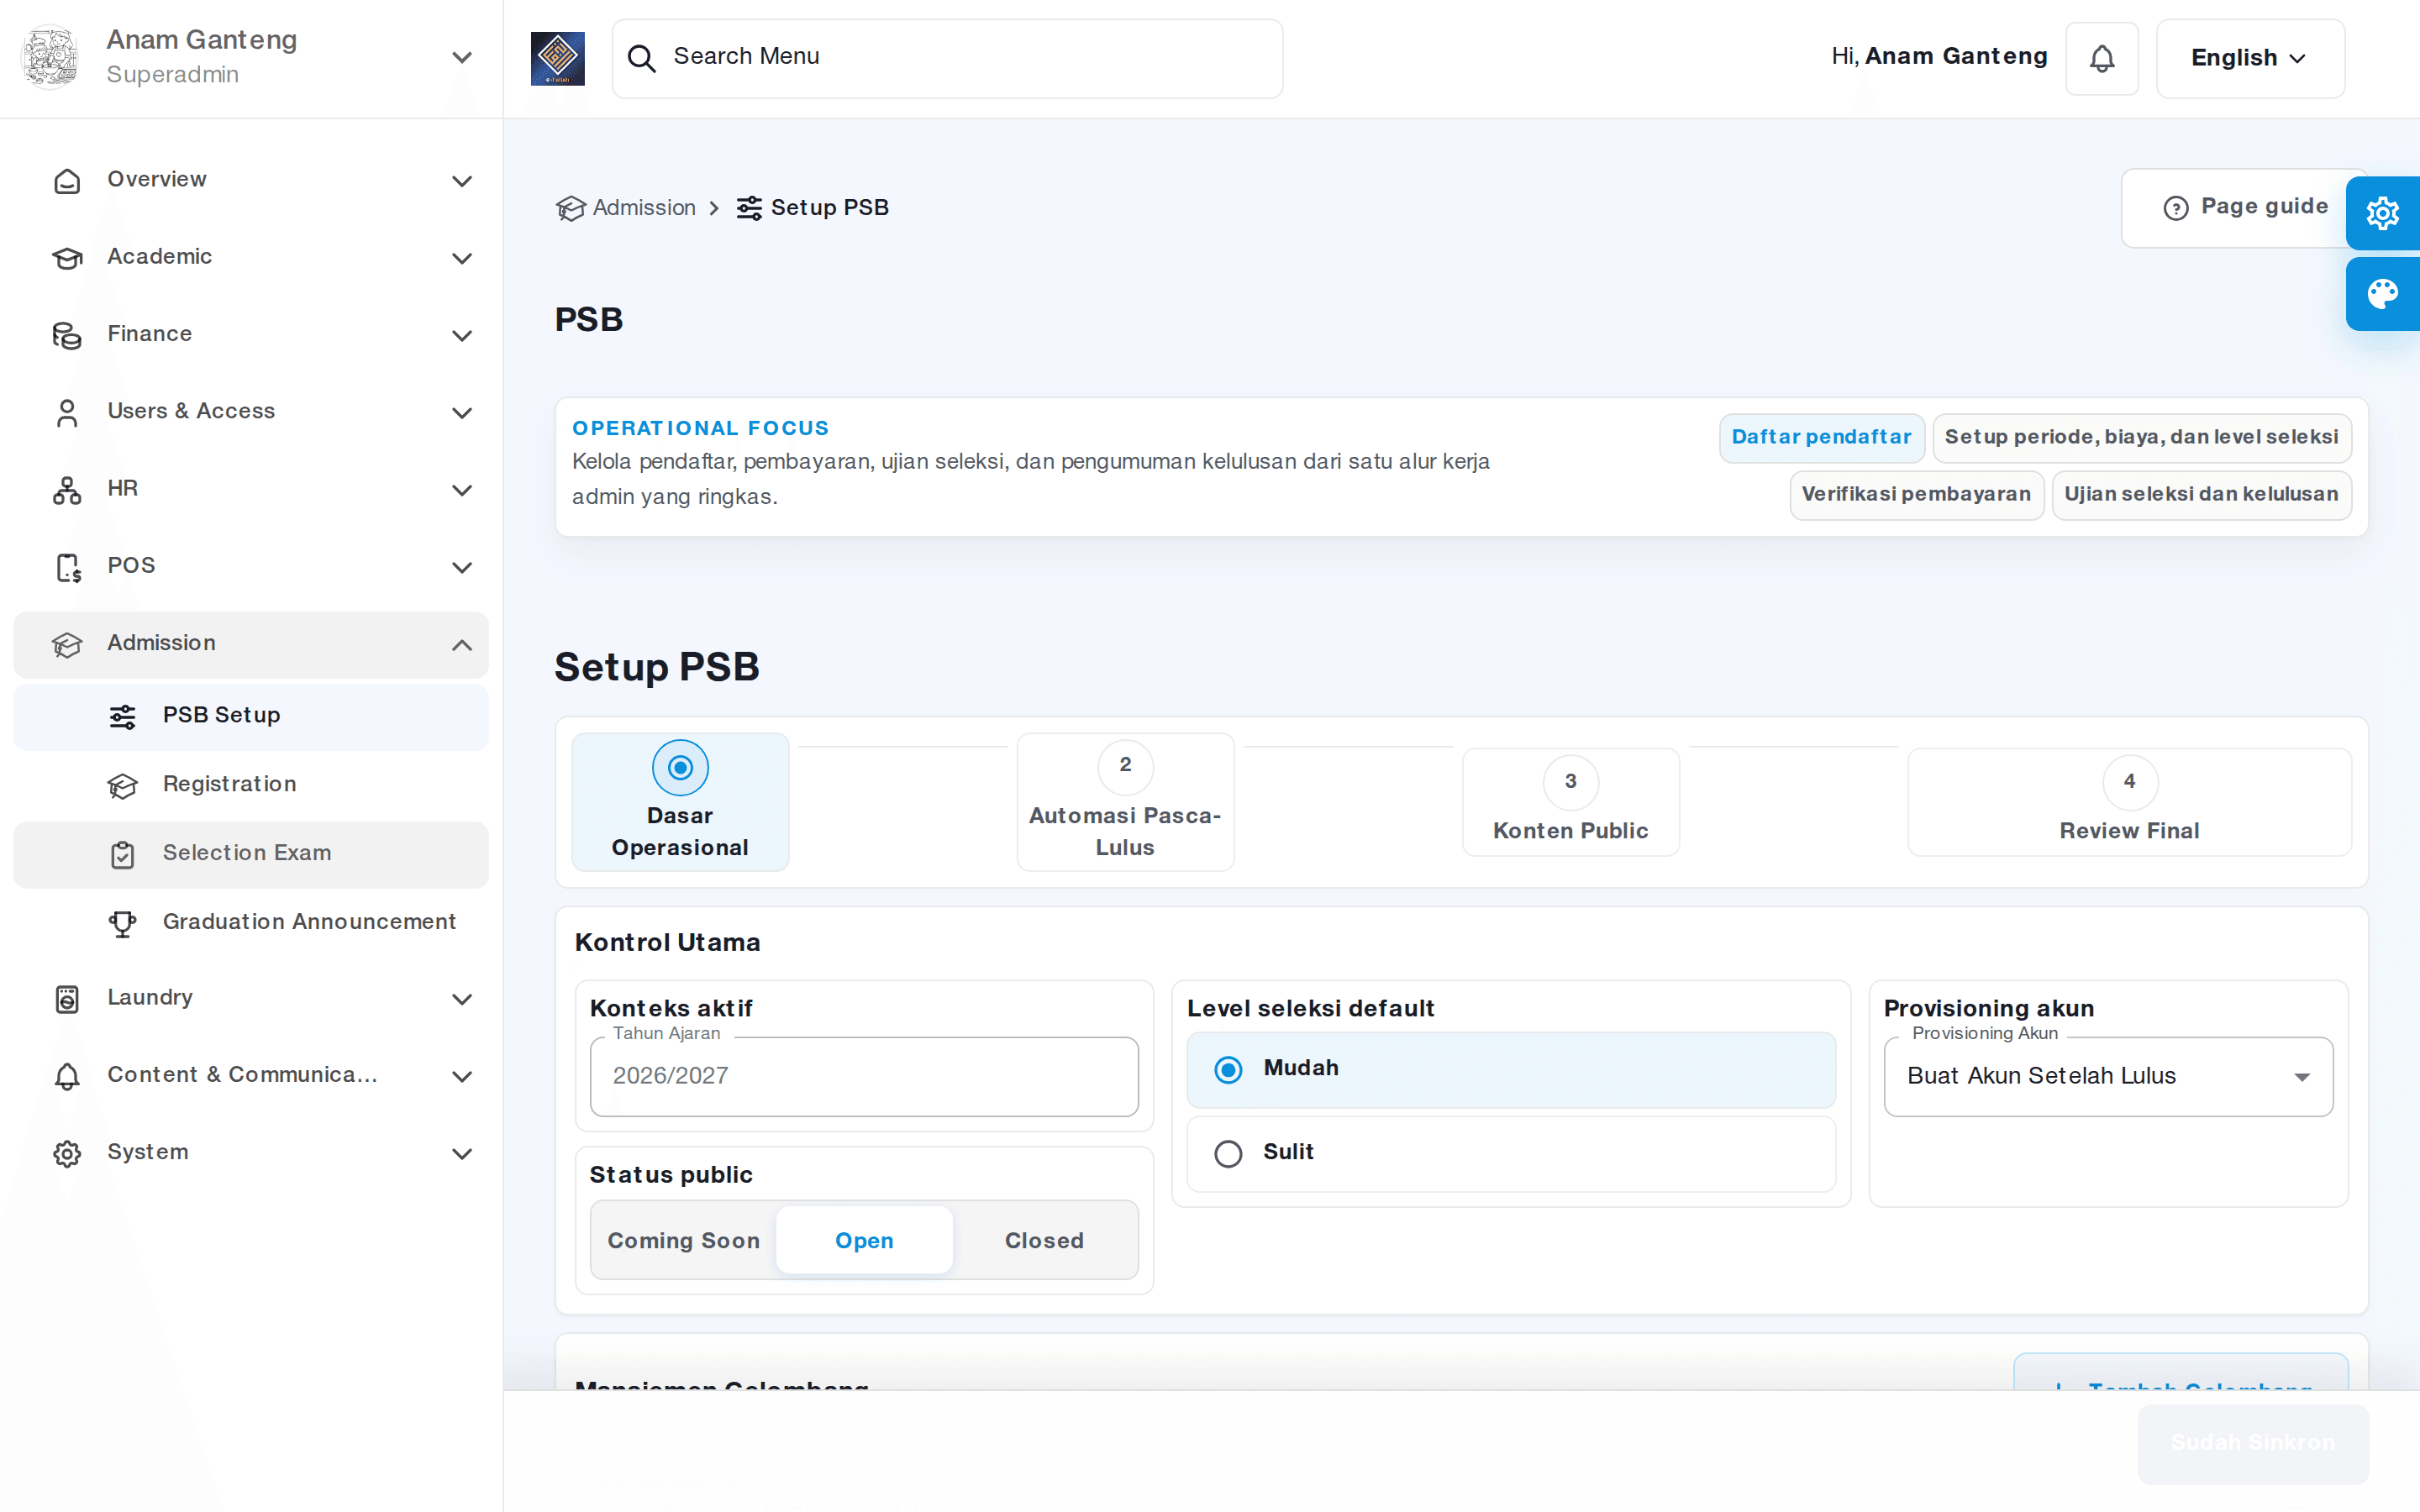
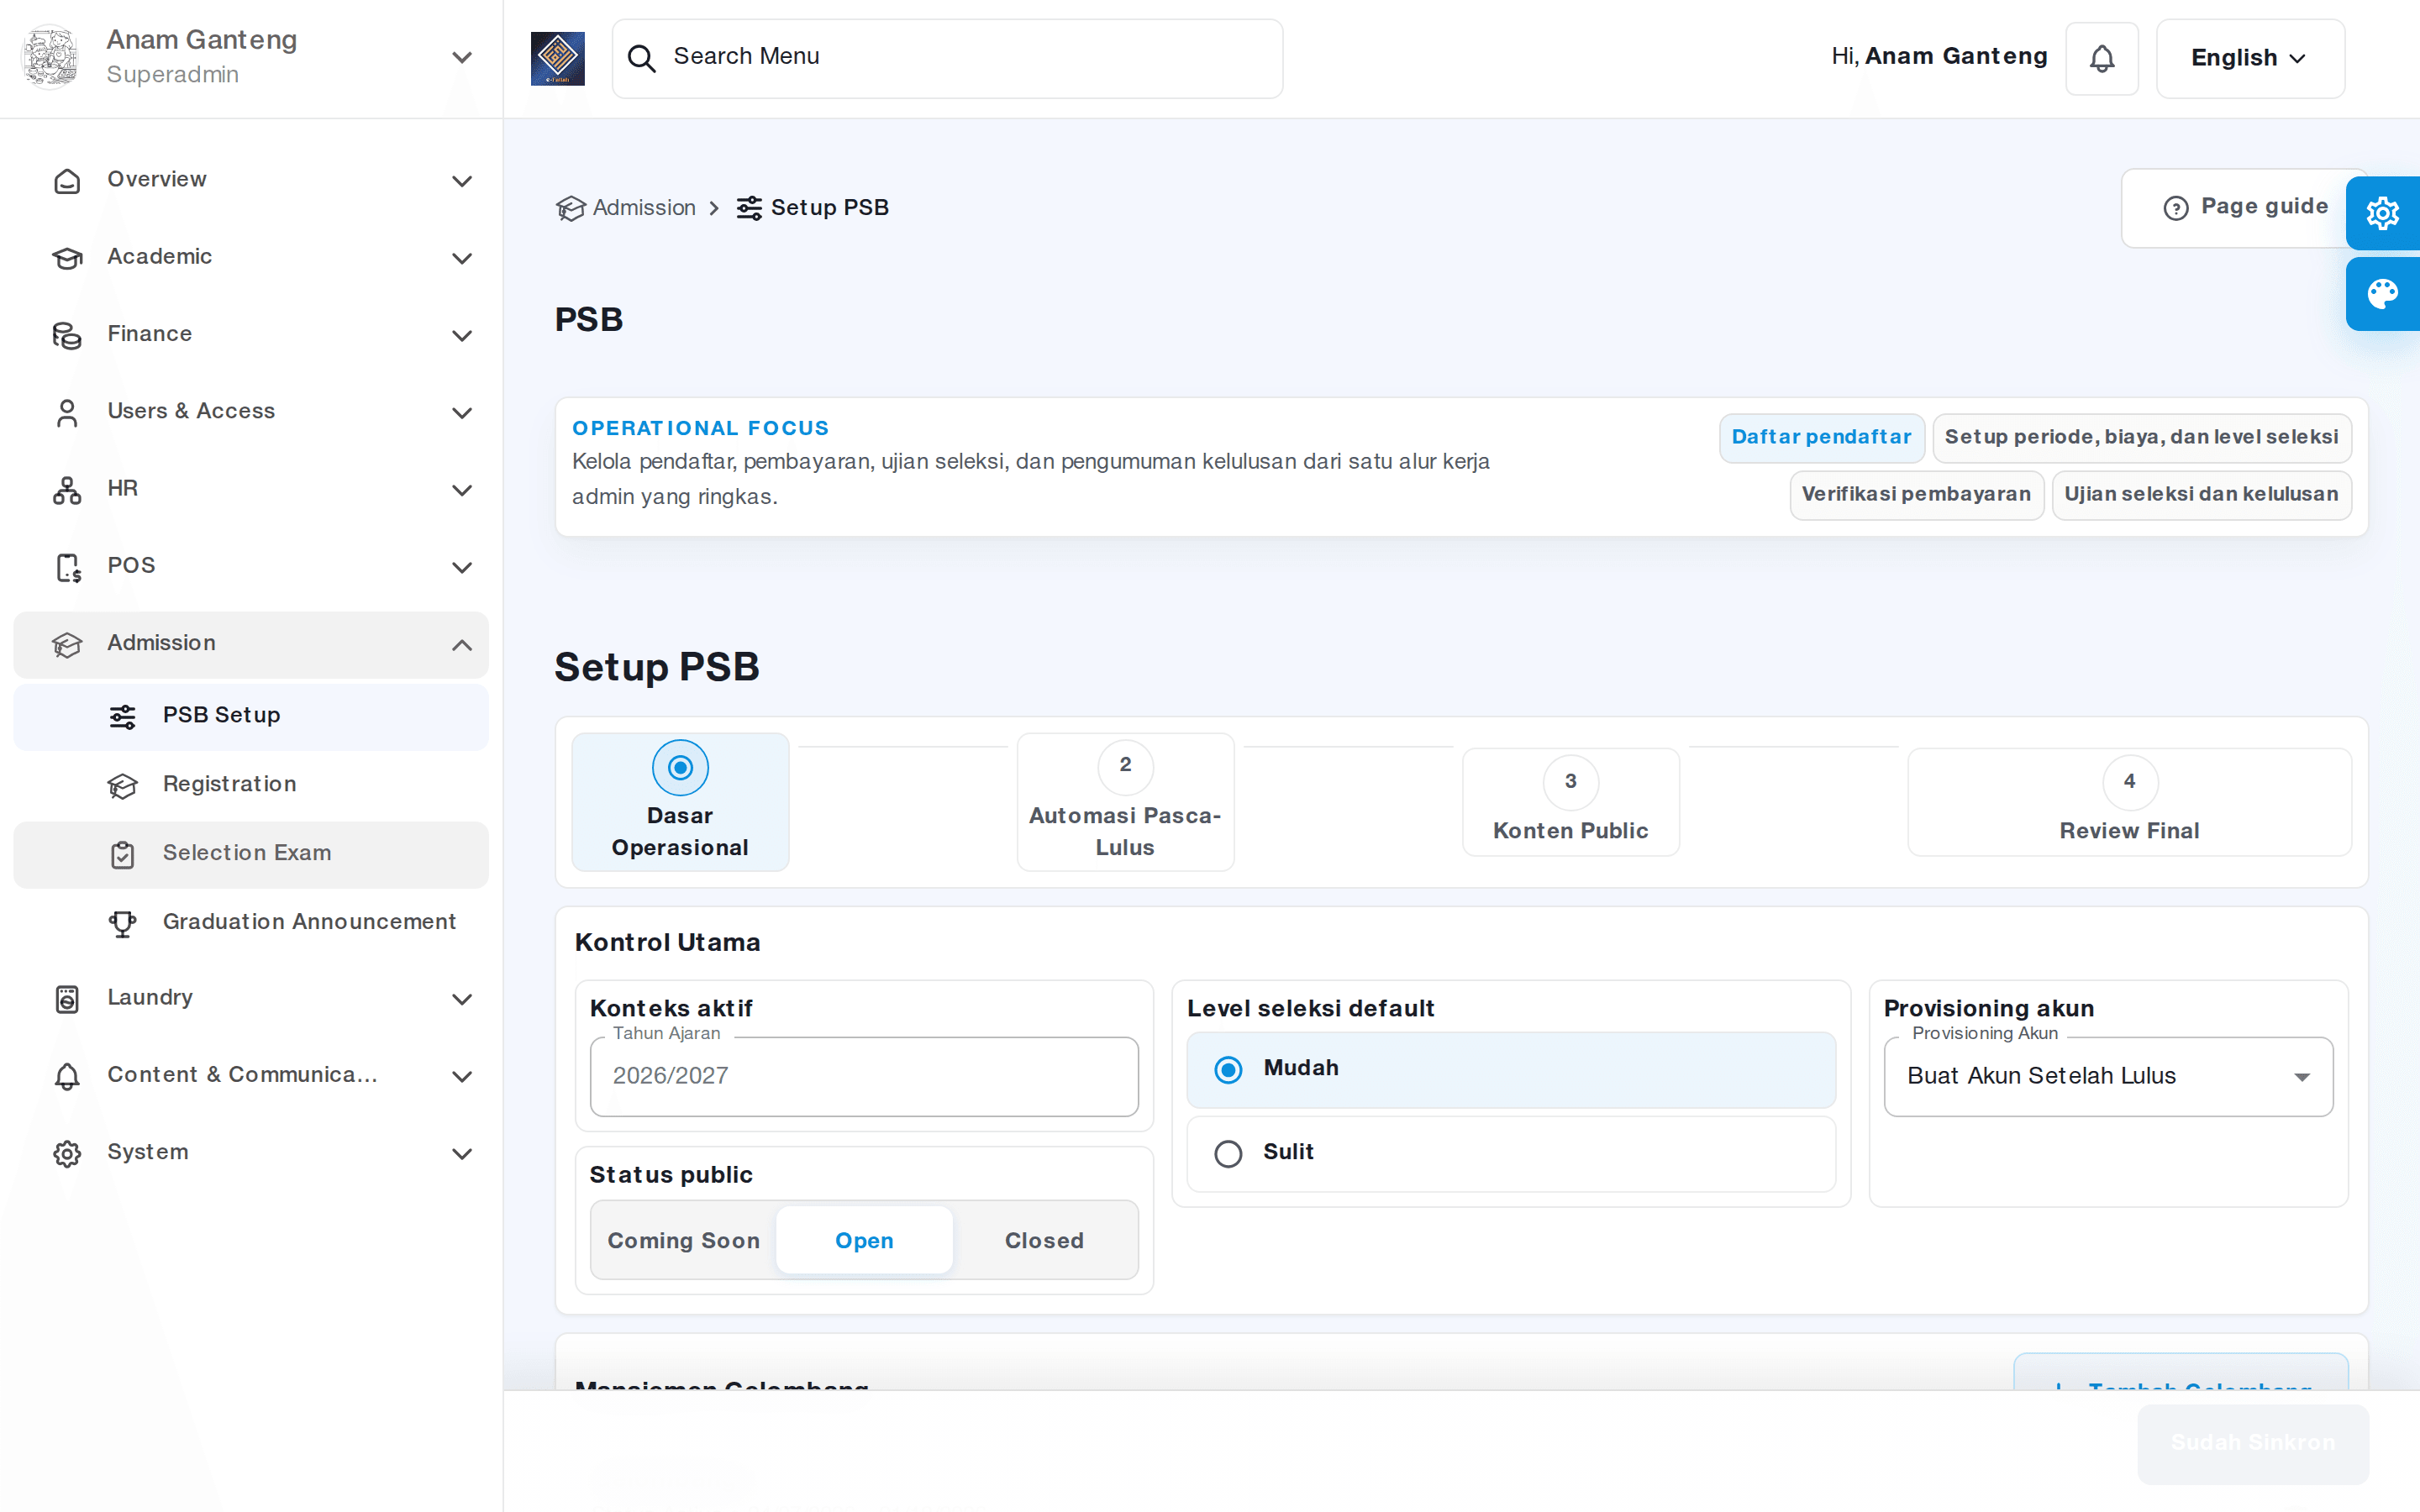
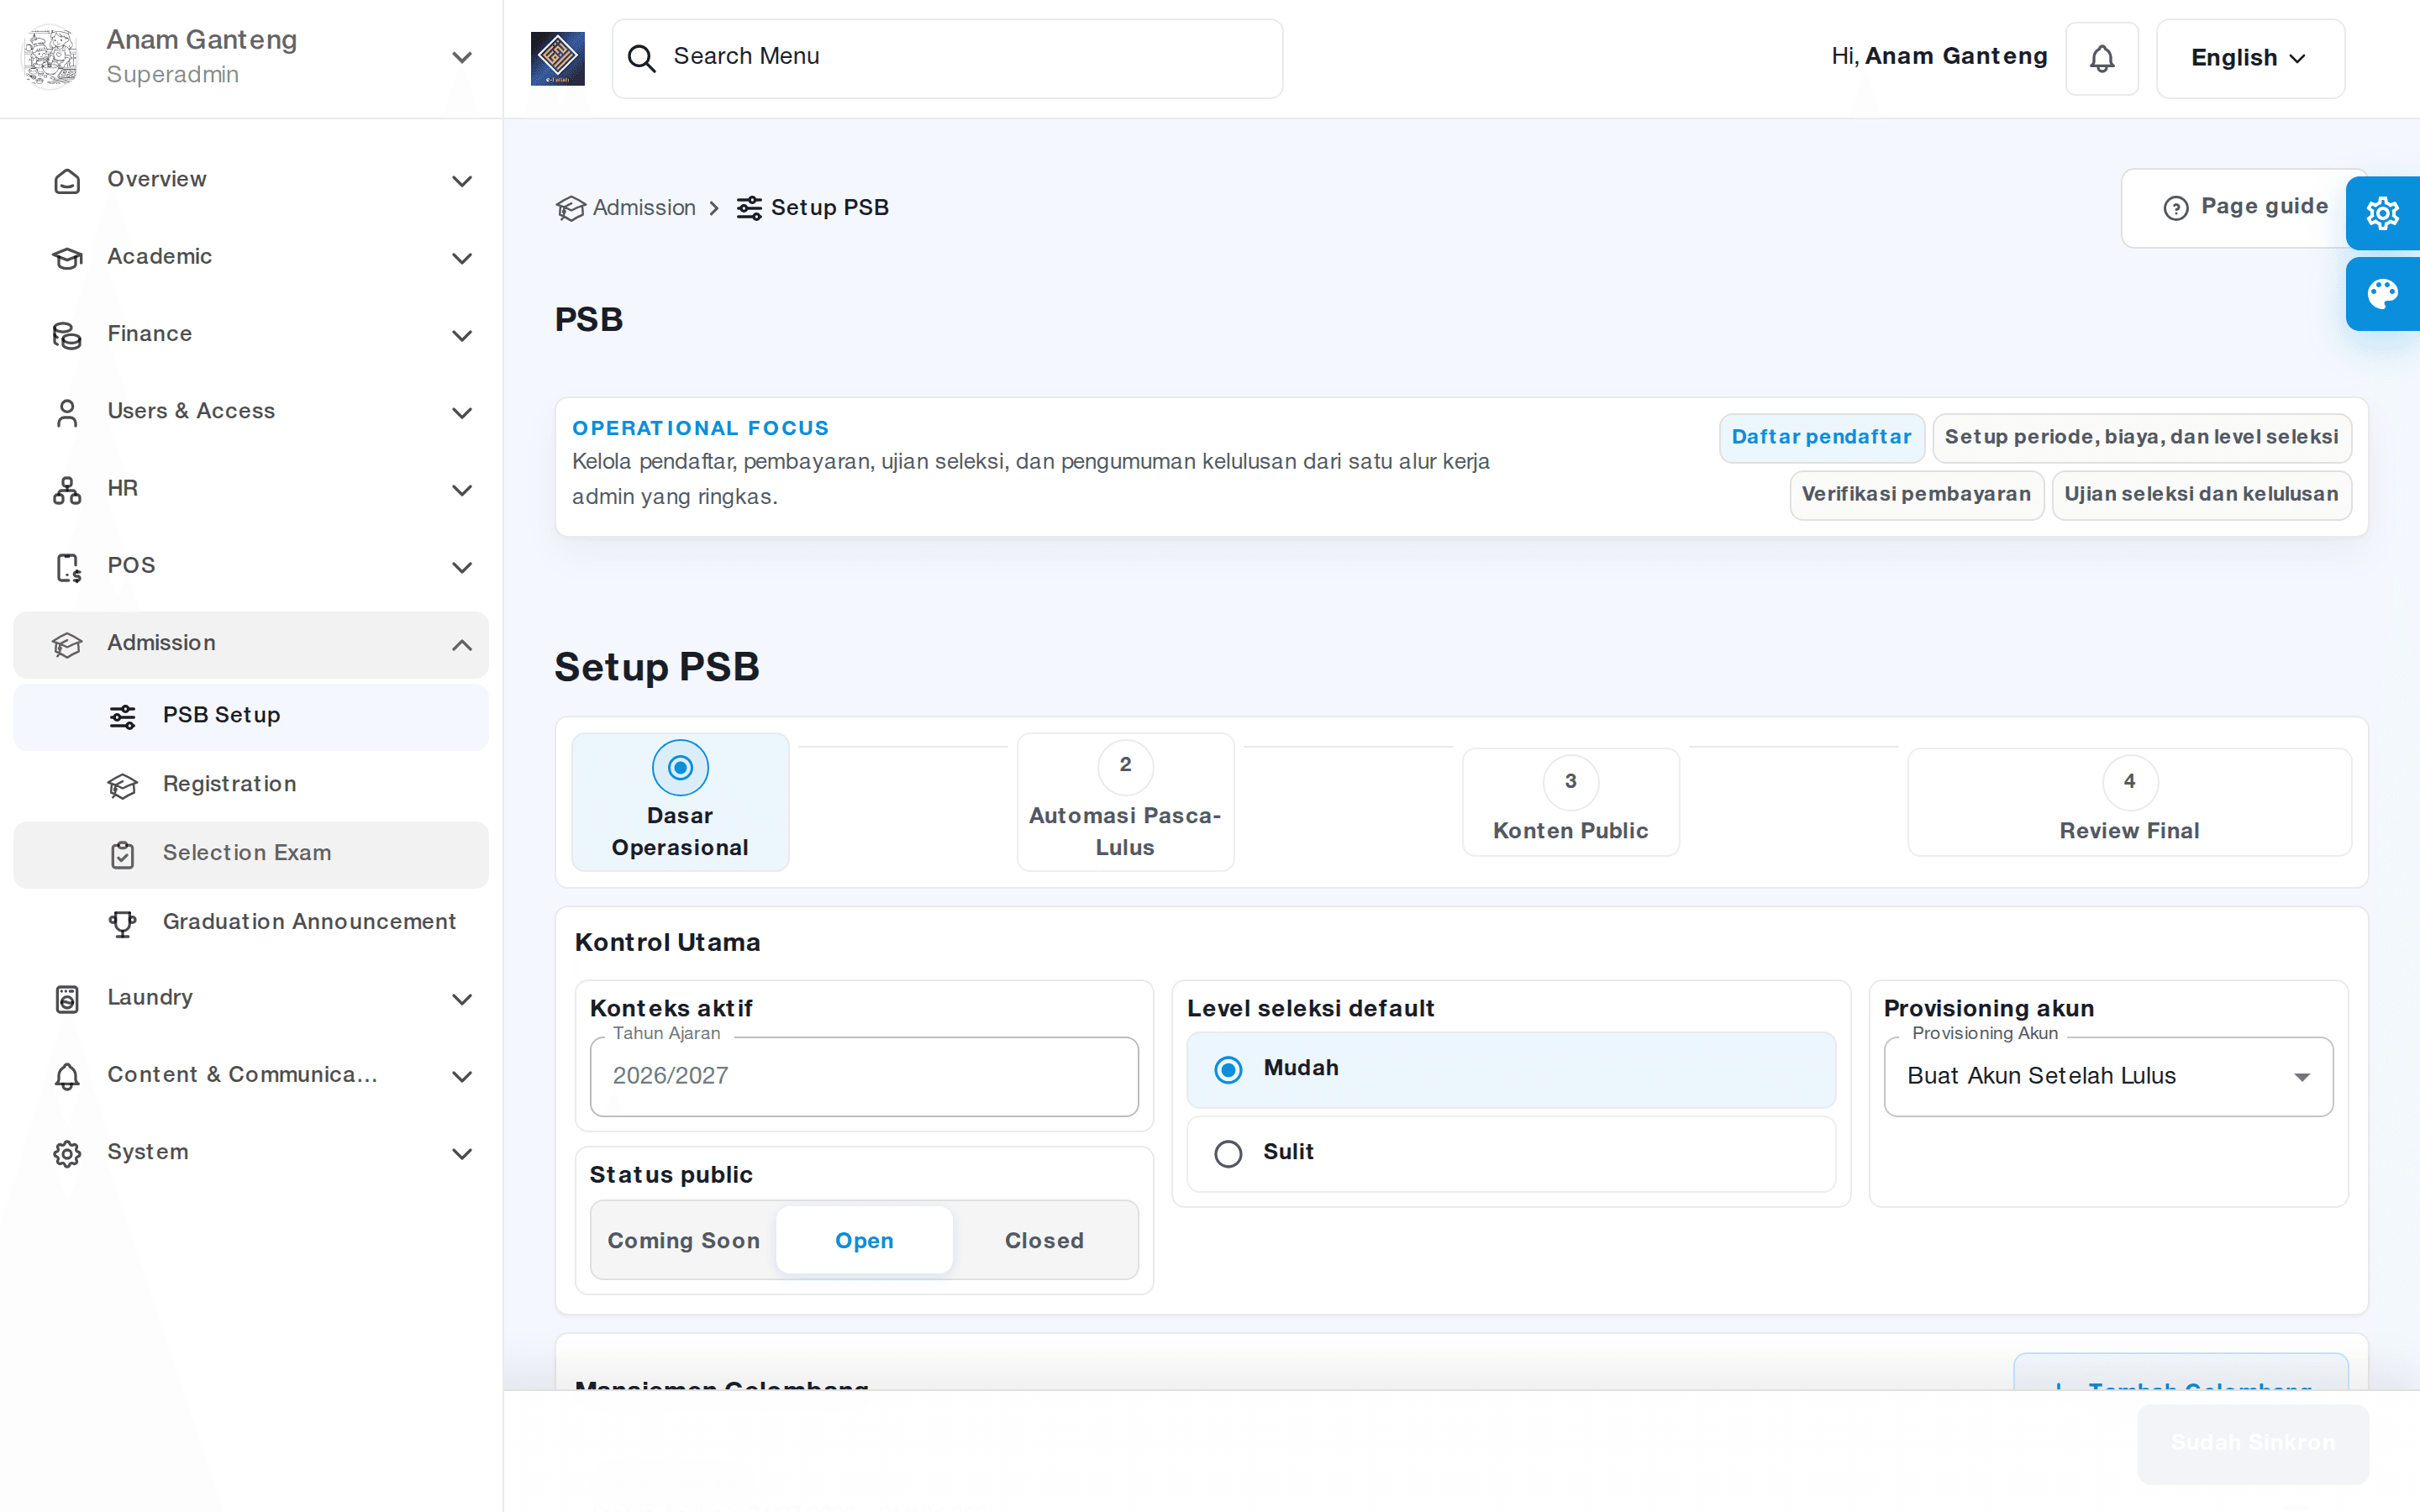
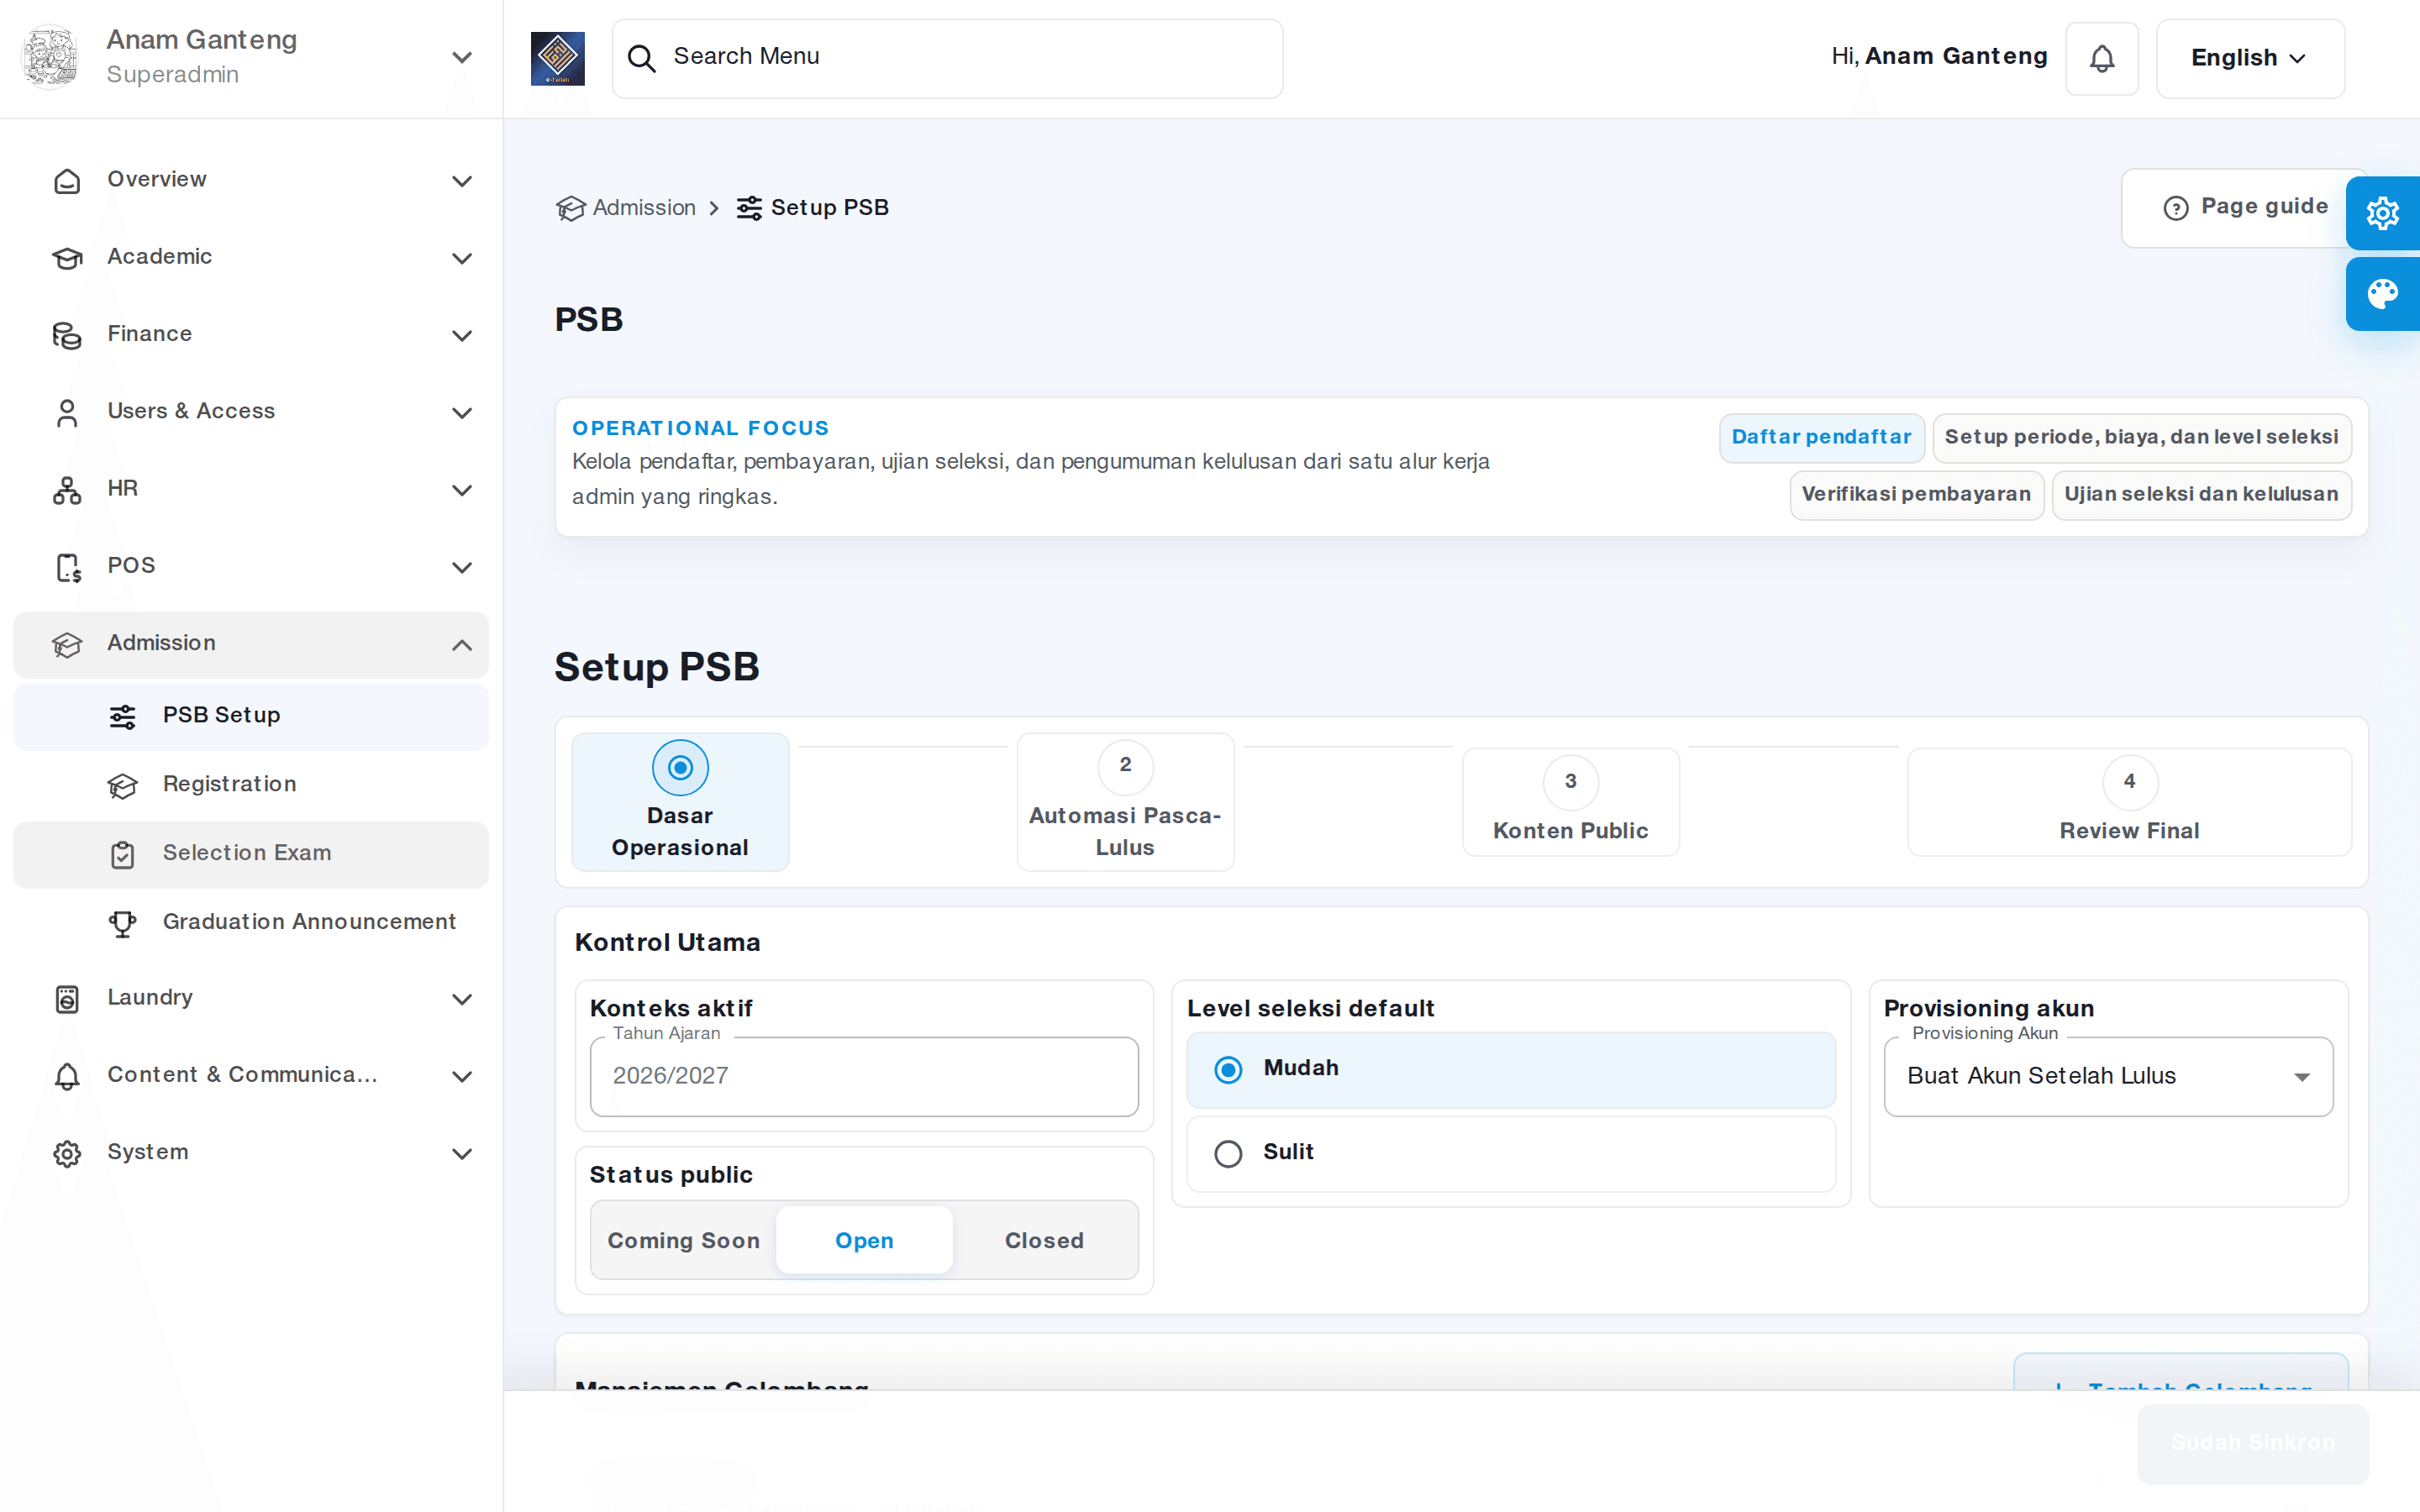
All admission parameters are configured in the Setup PSB menu. This is where you define the rules of registration before the gate opens to the public.
- Open the Setup PSB menu in the PSB section of the admin panel.
- Create a new registration batch, filling in the batch name (for example, Batch 1), the opening date, and the closing date.
- Set the admission quota per batch or per level so the system automatically closes registration once the quota is full.
- Configure the registration fee and any other cost components applicants must pay at the initial stage.
- Define the list of mandatory documents applicants must upload as part of verification.
- Save the configuration, then activate the batch so the online registration form becomes accessible.
A tidy configuration at this stage saves the committee a great deal of time during verification. Make sure the open/close dates and quota are final before you announce them to prospective parents.
Step 2: Monitoring Incoming Applicants
Once a batch is active, prospective students register through the online form and their data flows directly into the Pendaftaran (Registration) menu. This menu is the committee's daily control center.
- Open the Pendaftaran menu to see the full list of applicants who have registered.
- Use filters by batch, level, or status to narrow down the list.
- Click an applicant to open the details: personal data, parent/guardian data, uploaded documents, and payment status.
- Track the number of applicants against the quota so you know when to close or open the next batch.
The applicant list helps the committee ensure no prospective student is missed, while giving a quick sense of daily registration trends.
Step 3: Verifying Documents and Registration Payments
Each applicant must be verified before they are eligible to sit the entrance exam. This is still done from the Pendaftaran menu, on each applicant's detail page.
- Open the applicant detail, then check each uploaded document one by one against the requirement list.
- Mark documents as valid or request a correction if a document is unclear or incorrect.
- Check the registration payment status. If the applicant paid via manual transfer, match it against the school bank account statement, then confirm the payment.
- If your pesantren uses a payment gateway, the payment status updates automatically once the transaction succeeds.
- Change the applicant status to verified so they proceed to the selection stage.
Timely payment verification is important so that only genuinely serious applicants continue the process. For broader billing management after a student is accepted, Aerish provides a dedicated finance module.
Step 4: Scheduling the Entrance Exam
For pesantren that hold an admission test, scheduling and grading happen in the Ujian Seleksi (Entrance Exam) menu. This menu connects verified applicants to exam sessions.
- Open the Ujian Seleksi menu and create an exam session, such as a Qur'an reading test, an academic test, or an interview.
- Set the date, time, and room/group of the exam, then assign verified applicants to the appropriate session.
- Publish the schedule so applicants know when and where they must attend.
Splitting applicants into smaller sessions keeps the exam orderly, especially when a single batch has many applicants.
Entering Exam Scores
After the exam takes place, examiners or committee members enter scores through the same Ujian Seleksi menu.
- Open the finished exam session, then select the applicant to be graded.
- Enter scores per component according to the predefined weights, for example reading, memorization, and academics.
- The system helps compute the final score so the committee can more easily decide acceptance.
Use a consistent scoring scale so comparisons between applicants are fair and acceptance decisions are easy to justify.
Step 5: Publishing Results (Announcement)
Selection results are announced through the Pengumuman (Announcement) menu. Here the committee decides who is accepted and publishes the results so applicants can check them online.
- Open the Pengumuman menu, then review the list of applicants along with their final scores.
- Set the acceptance status (accepted, waitlisted, or not accepted) based on quota and scores.
- Compose the announcement text and publication date, then publish so applicants can view the results.
- Make sure the announcement clearly states the next steps for those accepted, such as re-registration.
Step 6: Converting Accepted Applicants into Students
The final step is turning accepted applicants into official students, complete with their accounts. This process is usually available from the Pengumuman menu or the admission follow-up, and serves as the bridge between PSB and academic data.
- Select applicants with an accepted status who have completed re-registration.
- Run the conversion process so the applicant data is moved into student data in the system.
- Place the new student into the active academic year and the appropriate class.
- Student (and guardian) accounts can be created so they can access the app.
With this conversion, the data entered during registration does not need to be retyped, so the transition from prospective to active student is fast and error-free.
Tips & Best Practices
- Finalize quota, fees, and batch dates in Setup PSB before announcing them publicly to avoid frequent revisions.
- Verify documents and payments daily so the applicant queue does not pile up near the closing date.
- Use the same score components and weights for all applicants in one batch for a fair selection.
- Prepare the announcement text and re-registration instructions well in advance so publishing results is smooth.
- Ensure the active academic year and classes are ready before converting applicants into students.
Troubleshooting
- Applicants cannot access the registration form. Check whether the batch is activated and the open/close dates in Setup PSB are correct.
- Payment was transferred but the status still shows unpaid. Match the entry in the school bank account and confirm it manually; for a payment gateway, wait for the transaction to sync.
- An applicant's document is unreadable or wrongly uploaded. Request a correction via the document status, then re-verify after the applicant uploads the correct file.
- Exam scores do not appear in the announcement. Make sure the scores are saved in the Ujian Seleksi menu and the applicant is linked to the correct exam session.
- Student conversion fails. Ensure an active academic year exists and the applicant is marked accepted and has re-registered.
FAQ
Does Aerish PSB support multiple registration batches?
Yes. You can create several batches in the Setup PSB menu, each with its own open/close dates, quota, and fees, then activate them according to the committee's schedule.
How do applicants pay the registration fee?
Payment can be made via manual transfer to the school bank account or through a payment gateway. The status is tracked in the applicant detail within the Pendaftaran menu.
Must every pesantren hold an entrance exam?
No. The Ujian Seleksi menu is optional. If your pesantren does not run a test, you can set acceptance directly in the Pengumuman menu based on document verification.
Does accepted applicant data have to be retyped as student data?
No. The conversion process moves applicant data into student data so there is no re-entry, then the student is placed into the active academic year and class.
Who can access the PSB module?
Only accounts with PSB access rights. Configure committee roles and permissions through Access Control settings so only authorized people can manage registration.
Related menus in the app
- Setup PSB — configure batches, quota, fees, and document requirements before registration opens.
- Pendaftaran — the hub for monitoring applicants, verifying documents, and confirming payments.
- Ujian Seleksi — schedule exam sessions and enter applicant scores.
- Pengumuman — set acceptance status and publish selection results.